The story begins.
So the story starts when my friend and I went on a vacation! They were bored, and as a massive book fan, they decided to bring their e-reader. Something which I personally haven’t seen before. I mean, I heard of them, and I saw people using them at the beach, but I didn’t get a chance to actually use one or see how they work.

^ Saw similar book.
During the vacation, I decided to take in mind the different features that they had and even stumbled upon an old custom community project called The Open book Project.
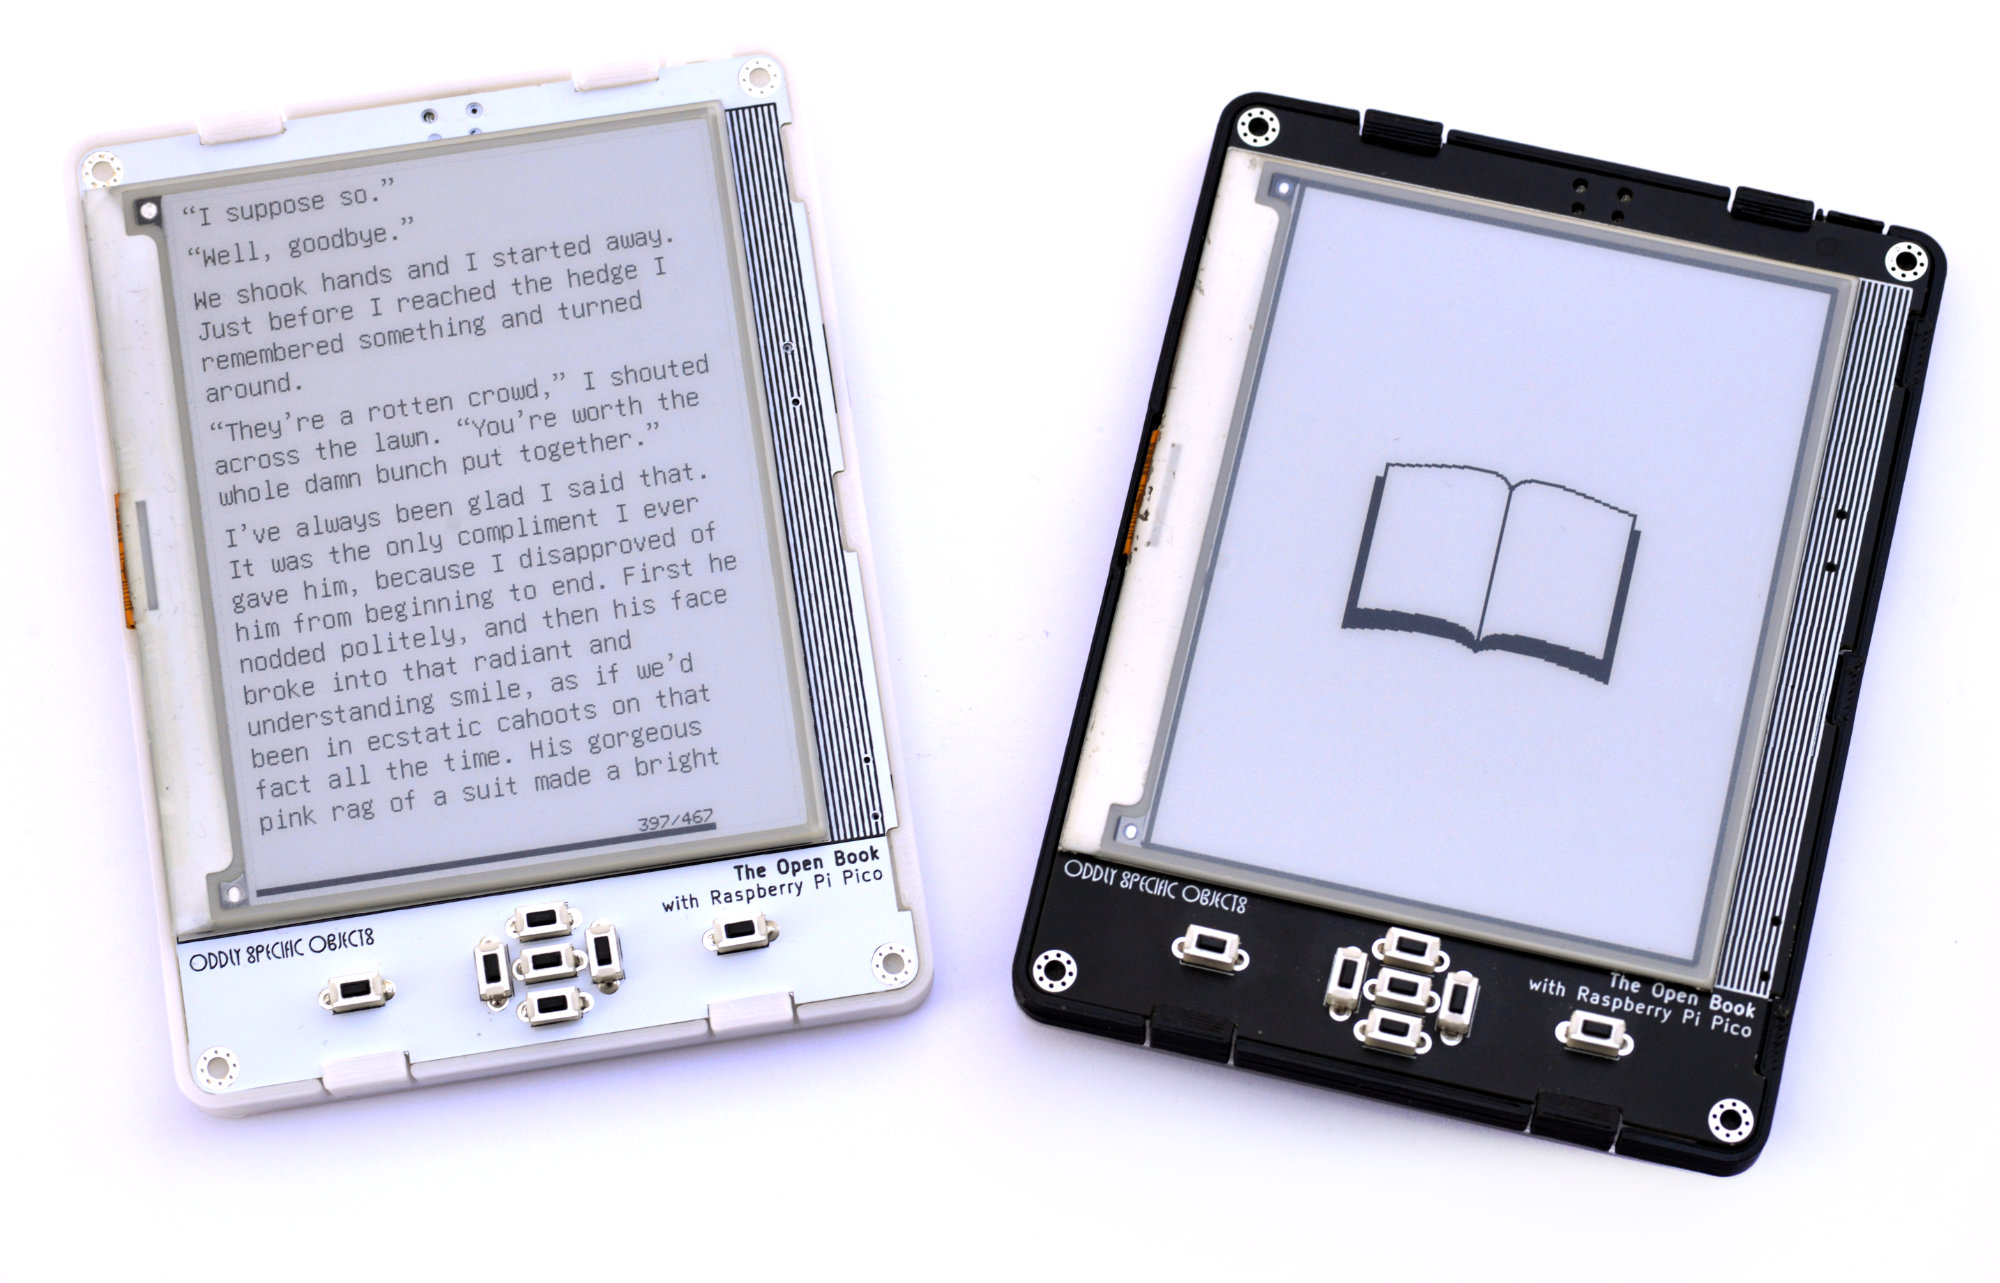
It is quite an incredible project by Joeycastillo and is worth checking out! https://github.com/joeycastillo/The-Open-Book
The project works with a Raspberry Pi Pico to power everything and an e-ink display, which is quite cool!
Unfortunately tho I didn’t have the ability to order the custom PCB it needed or to be able to find the parts for it, as it has been discontinued for a while now.
But from my research and using my friends e-book I decited that the main features that I wanted to have in my e-book reader are:
- Reading e-books in different formats (PDF, EPUB, etc.)
- A simple and easy-to-use interface
- Ability to navigate with buttons or swipes to change pages.
Not that bad right? But… How?
Recommendations coming in clutch!
And like with everything, because I was interested in such a thing, YouTube decided to flood me with Kindle hacking, and that’s how I discovered Koreader.
But I hear you ask me, “Aris… What is Koreader? And why do the recommendations give you that? And what did you do on the Friday of 152-”
HAHAHAHa yes ofc I forgot to tell you! What is Koreader? :)

KOReader is a document viewer for E Ink devices. This supports various e-book formats and ZIP files. It’s available for Kindle, Kobo, PocketBook, Android, and desktop Linux.
It is one of the main things that people who want to hack their e-book readers do so they dont rely on proprietary software. It is open source and has a very active community, which is quite nice!
Returning from vacation
So we are back from vacation now, and I remember that I wanted to see what I could do with that idea. As the title says, I said the infamous “I can make that.”
QUEUE EPIC GUITAR SOLO

Ok, so back to our story. When I returned home, I remembered that I had a display lying around, which was about 5 inches with an HDMI cable capability, which could be perfect for this project.
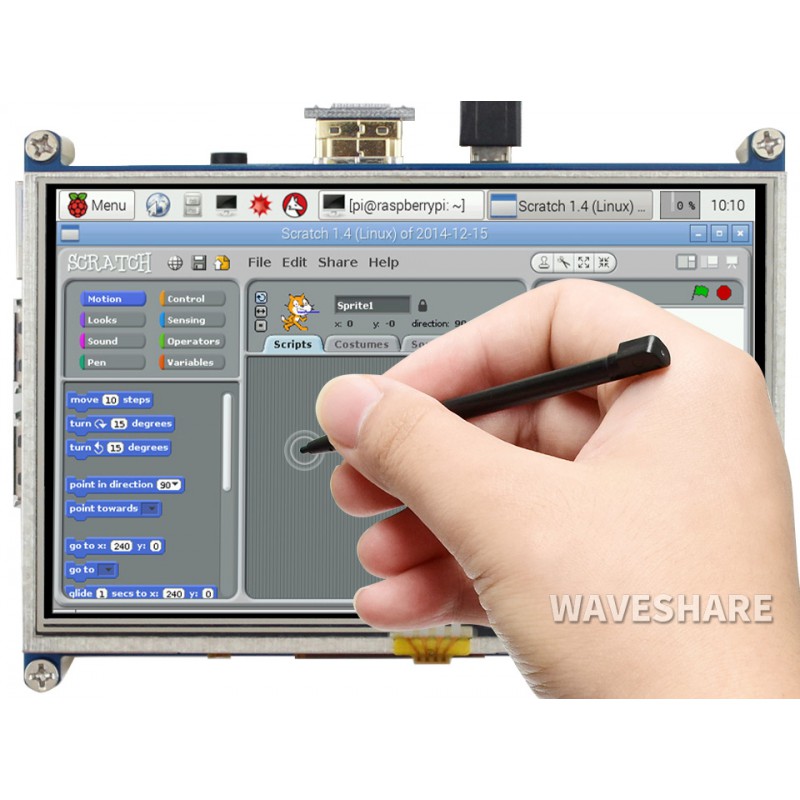
Specifically, the Waveshare 5-inch Resistive Touch Screen LCD display, which would be perfect for this project!
But I had an issue… The touchscreen is quite.. Not accurate for use as an e-reader, and I didn’t want to use it as a display only. So I needed something, but what?
Faint whisper: “Buttons….”
Me: What?
Slightly louder: “Buttons…”
Me: What do you mean buttons?
LOUDER: “BUTTONS”
Me: Oh. Like buttons to navigate the menu and stuff?
Other voice: “Yes.”
Me: Ah.
Other voice: “Yea.”
Okay! So we can use buttons!! But buttons from where? I don’t have any buttons lying around, and I don’t want to order some because of the shipping time and stuff.

Looks at old Printer
Okay its not exactly old, but it is broken and thats what matters! And the most important? It has buttons! So I can use those buttons for my project! Perfect!
How bad can it be, right?
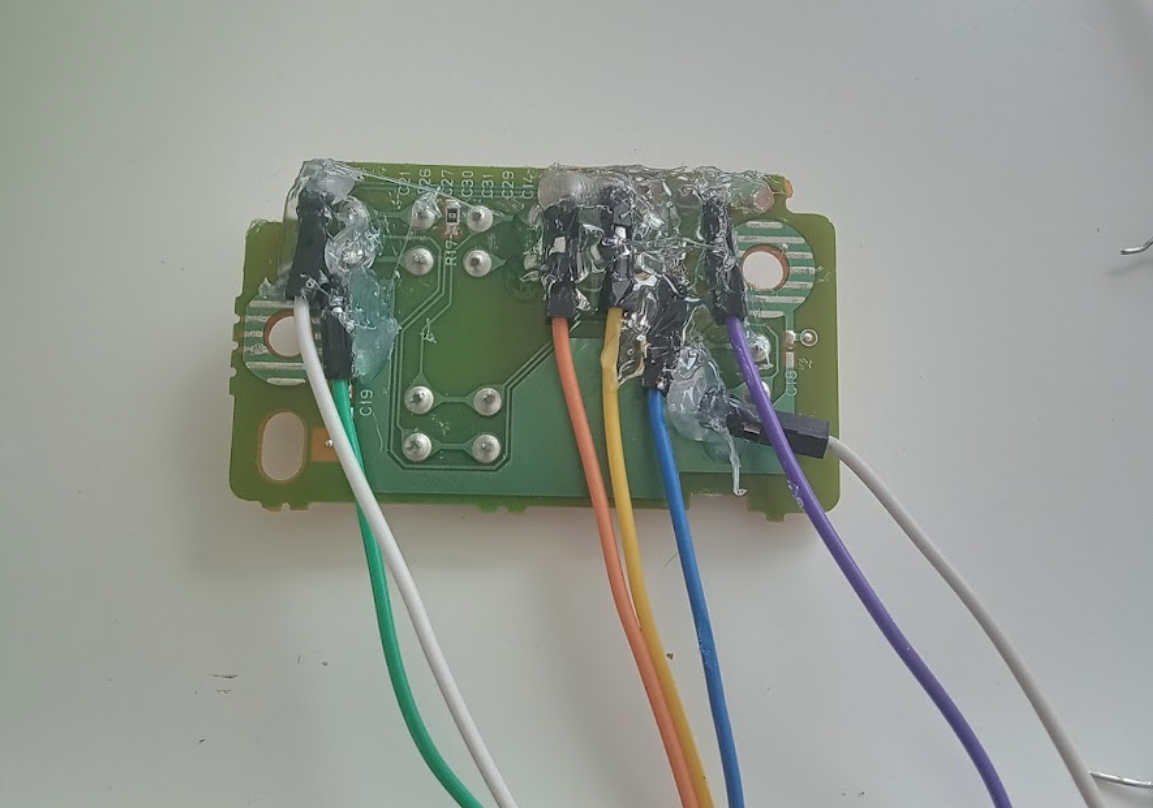
The answer is bad.
But I mean it wasn’t as bad, but I did have to do some hacking around to find which ones are the ground and which are the buttons, but I managed to do it!
Now I just needed to connect them to the GPIO pins of the Raspberry Pi, and I was good to go!
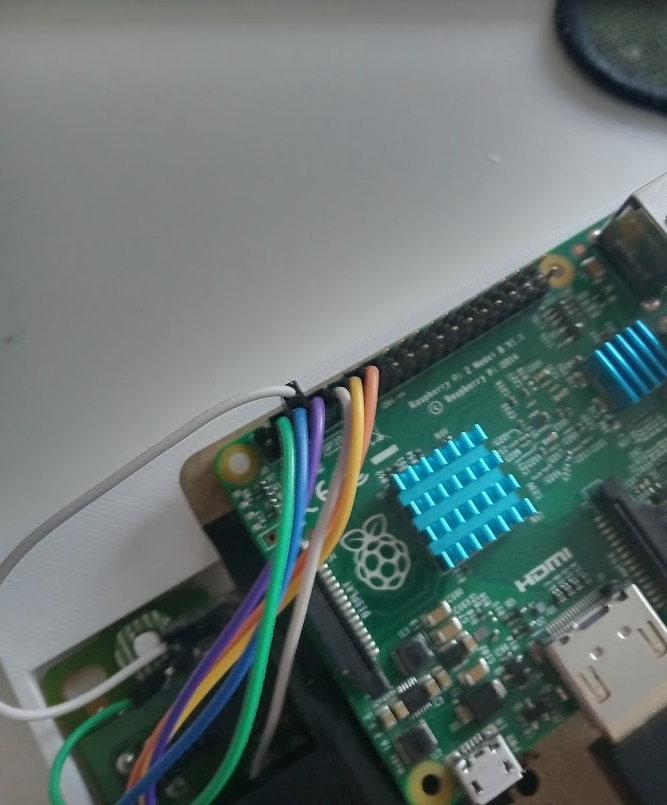
Then we just need to install KoReader on the Raspberry Pi, and we are good to go!
The problem that I encountered immediately is that KoReader is not available for the Raspberry Pi Zero, which was my initial plan, as it would be cheap but also compact.
I found out that its hardware architecture, memory limits, and strict display driver requirements made it incompatible with KoReader, so I went for the next best thing, which is the Raspberry Pi 2B, which is a bit more powerful and has better support for KoReader.
Now we can finally navigate the menu once we install it and have a cron job to open it on boot!
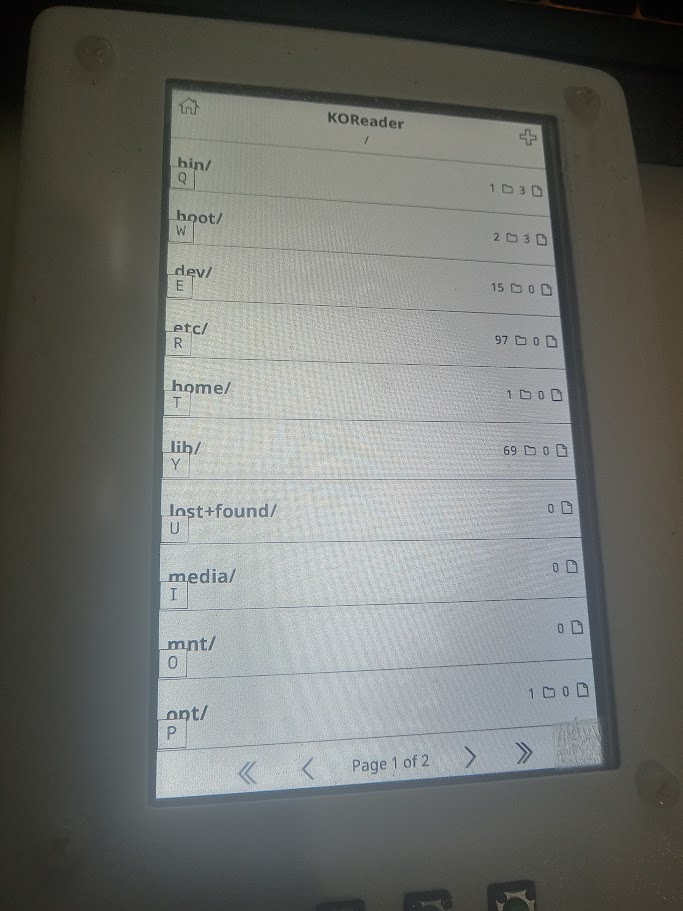
Aris Procceeds to press printer buttons a lot to make them work
And.. Nothing works or happens..
Well, that’s because KoReader is not configured to work with the buttons and the GPIO pins, so I had to do some research and find out how to configure it to work with the buttons.
One way of doing that, which I ended up using, is a Python script to translate the button GPIO inputs to keyboard inputs, which KoReader can understand and use to navigate the menu and stuff!
import gpiozero
import uinput
from signal import pause
import time
import subprocess
import re

device = uinput.Device([
    uinput.KEY_LEFT,
    uinput.KEY_RIGHT,
    uinput.KEY_UP,
    uinput.KEY_DOWN,
    uinput.KEY_ENTER,
    uinput.KEY_ESC,
    uinput.KEY_F1,
    uinput.KEY_LEFTCTRL,
    uinput.KEY_H,
    uinput.KEY_T,
])

def get_brightness():
    try:
        # Run the xrandr command and capture the output
        output = subprocess.check_output(['xrandr', '--verbose']).decode('utf-8')

        # Regular expression to find the brightness value
        brightness_regex = r'\s*Brightness:\s*([0-9.]+)'
        match = re.search(brightness_regex, output)

        if match:
            brightness = float(match.group(1))  # Convert the brightness value to float
            return brightness
        else:
            print("Brightness information not found.")
            return None

    except subprocess.CalledProcessError as e:
        print(f"Error executing command: {e}")
        return None
    except Exception as e:
        print(f"An error occurred: {e}")
        return None

if __name__ == "__main__":
    brightness_value = get_brightness()
    if brightness_value is not None:
        print(f"Current brightness: {brightness_value}")

def left():
    device.emit_click(uinput.KEY_LEFT)
    print("Left")

def right():
    device.emit_click(uinput.KEY_RIGHT)
    print("Right")

def up():
    device.emit_click(uinput.KEY_UP)
    print("Up")

def down():
    device.emit_click(uinput.KEY_DOWN)
    print("Down")

def enter():
    device.emit_click(uinput.KEY_ENTER)
    print("Enter")

def go_esc():
    # Simulate ESC key to go "home" in KOReader
    device.emit_click(uinput.KEY_ESC)
    print("Go Home (Esc)")

def go_home():
    # Manually emit Ctrl down, H click, Ctrl up
    device.emit(uinput.KEY_LEFTCTRL, 1)  # Press Ctrl
    device.emit_click(uinput.KEY_H)      # Press and release H
    device.emit(uinput.KEY_LEFTCTRL, 0)  # Release Ctrl
    print("Go Home (Ctrl+H)")

def toggle_touch():
    # Manually emit Ctrl down, H click, Ctrl up
    device.emit(uinput.KEY_LEFTCTRL, 1)  # Press Ctrl
    device.emit_click(uinput.KEY_T)      # Press and release H
    device.emit(uinput.KEY_LEFTCTRL, 0)  # Release Ctrl
    print("TOGGLE touch (Ctrl+T)")

def up_brightness():
    currentBrightness = get_brightness() or 0.1
    newBrightness = min(currentBrightness + 0.1, 1.0)  # Limit to 1.0
    subprocess.run(["xrandr", "--output", "HDMI-1", "--brightness", str(newBrightness)])
    print("TOGGLE Up brightness", newBrightness)

def down_brightness():
    currentBrightness = get_brightness() or 0.1
    newBrightness = max(currentBrightness - 0.1, 0.0)
    subprocess.run(["xrandr", "--output", "HDMI-1", "--brightness", str(newBrightness)])
    print("TOGGLE down brightness ", newBrightness)

# Change these pins to match your wiring!
button_left = gpiozero.Button(3, pull_up=True, bounce_time=0.05)
button_right = gpiozero.Button(2, pull_up=True, bounce_time=0.05)
button_up = gpiozero.Button(17, pull_up=True, bounce_time=0.05)
button_down = gpiozero.Button(4, pull_up=True, bounce_time=0.05)
button_enter = gpiozero.Button(27, pull_up=True, bounce_time=0.05)


# Detect "up" + "enter" pressed together to go home
def check_combo():
    if button_up.is_pressed and button_enter.is_pressed:
        go_esc()
        time.sleep(0.1)
        return True
    if button_left.is_pressed and button_enter.is_pressed:
        down_brightness()
        time.sleep(0.8)
        return True
    if button_right.is_pressed and button_enter.is_pressed:
        up_brightness()
        time.sleep(0.8)
        return True
    if button_left.is_pressed and button_right.is_pressed:
        go_home()
        time.sleep(0.1)
        return True
    if button_down.is_pressed and button_up.is_pressed:
        toggle_touch()
        time.sleep(0.1)
        return True
    return False

# Example: wrap every handler
def up_handler():
    if not check_combo():
        up()

def enter_handler():
    if not check_combo():
        enter()

def left_handler():
    if not check_combo():
        left()

def right_handler():
    if not check_combo():
        right()

def down_handler():
    if not check_combo():
        down()

button_up.when_pressed = up_handler
button_enter.when_pressed = enter_handler
button_left.when_pressed = left_handler
button_right.when_pressed = right_handler
button_down.when_pressed = down_handler

print("Button-to-key emulator running... Press buttons to send key events.")
pause()
We will also be using xrandr to control the brightness of the display as there is not a physical button for that, and it is quite useful to have it on the e-book reader!
So this doesnt happen:

You can find the keyboard inputs that KoReader uses in their documentation: https://koreader.rocks/user_guide/#L2-keyboardshortcuts
This allowed me to have the following button combinations:
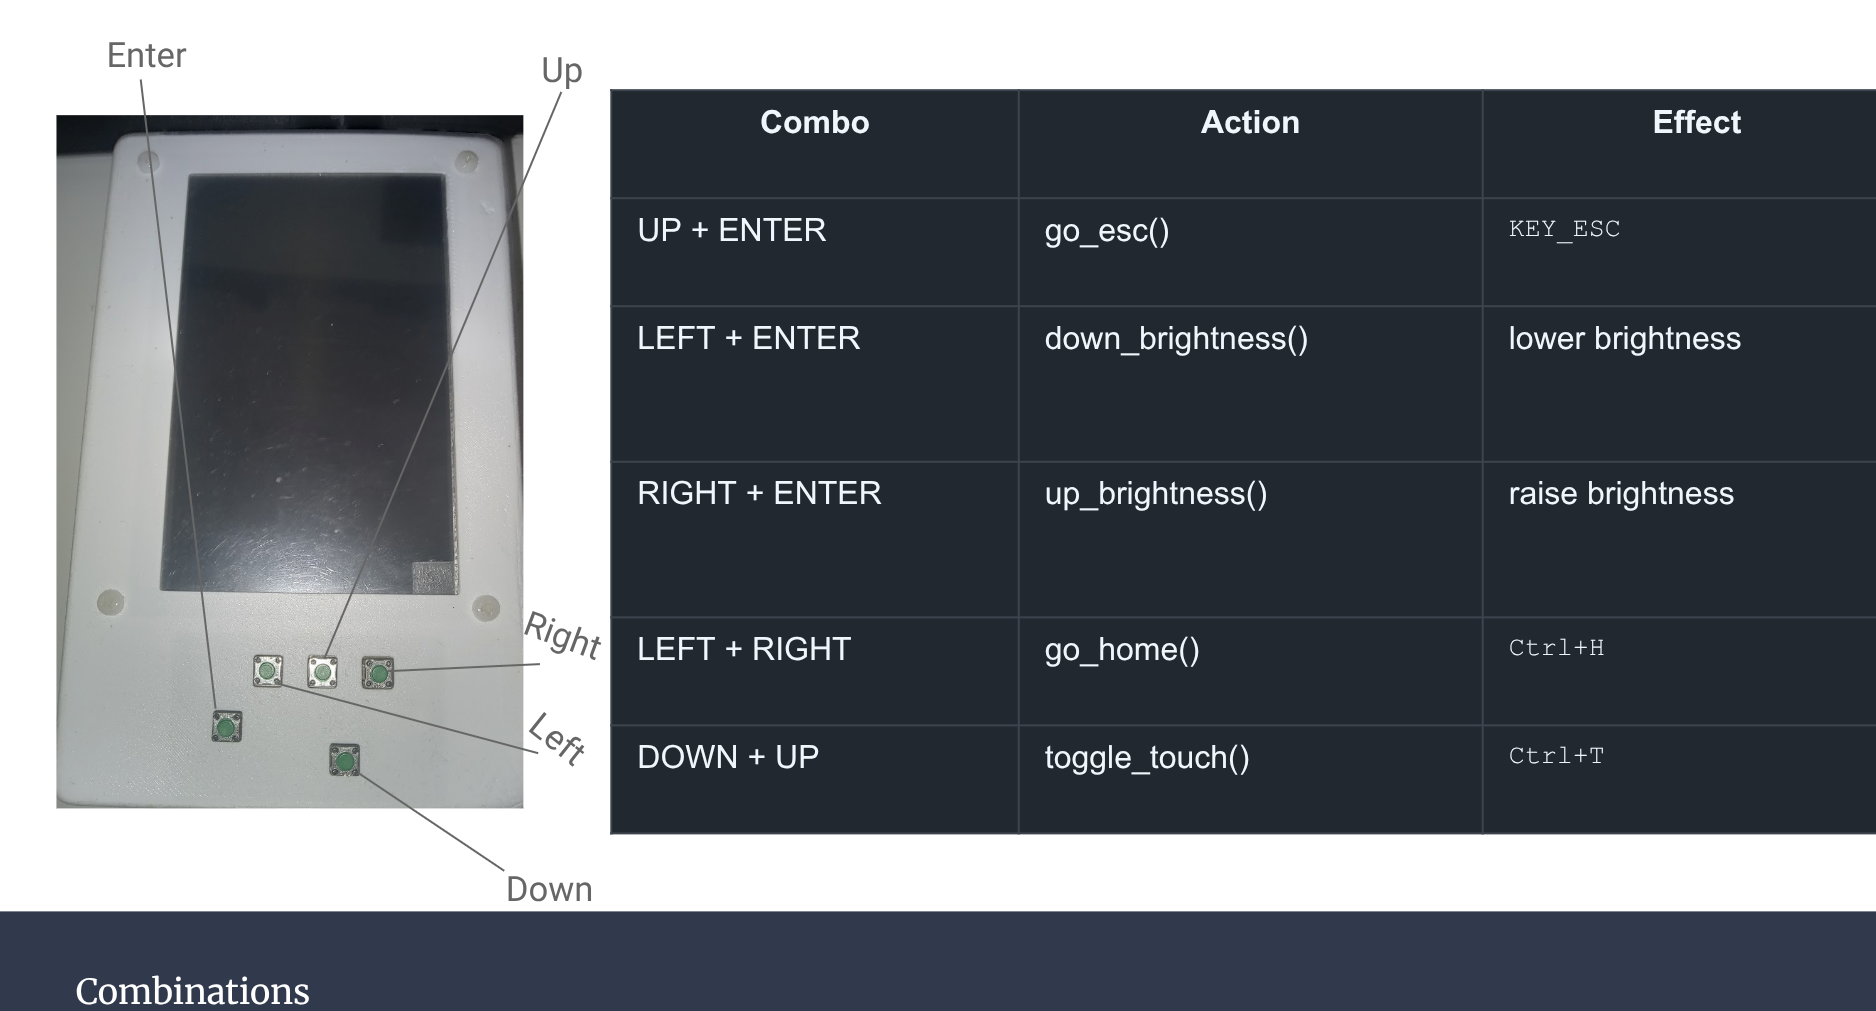
This gave me a lot of functionality and made it quite easy to navigate the menu and stuff!
And with that! I had a working e-book reader!
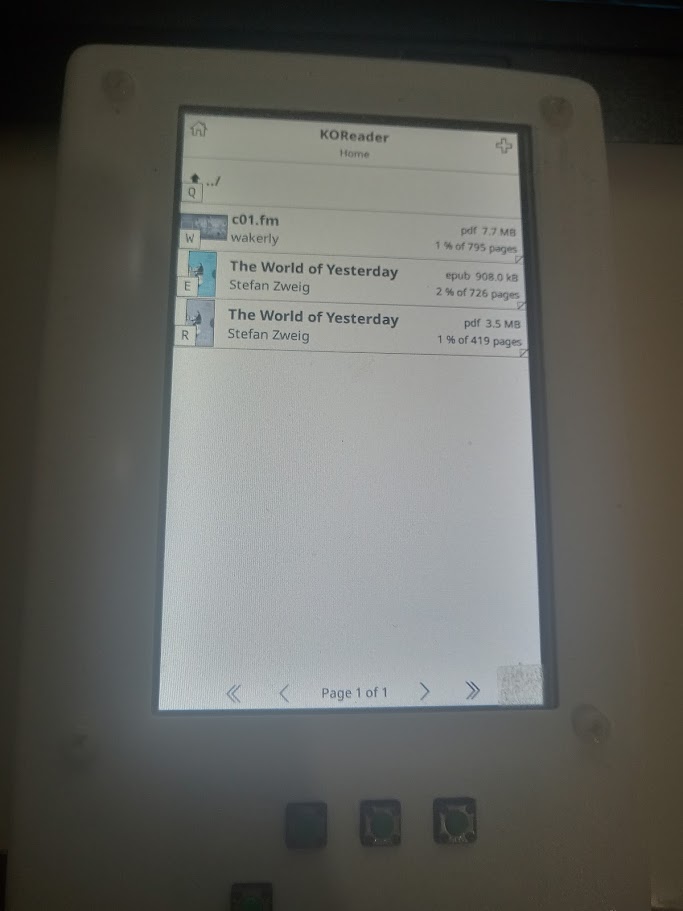
I have created a Github repository with all the 3d printed parts! https://github.com/Arisamiga/e-book-project-files
Note tho that the 3D printed parts are not perfect and might need some adjustments to fit your specific display and buttons.

I used a 3D designing software called FreeCAD. I normally would use something like SolidWorks, but I decided to try a new open-source software, and I am actually quite impressed!
It is mainly built with the idea of users from other CAD software in mind, so you can also customise it to look similar to the software you are used to!
Conclusion
This overall was a really fun project, and I got to learn a lot, especially in the area of designing. One of the parts that I would want to improve is the design of the case, as it is quite bulky and not very ergonomic, but it was a good first attempt, and I am quite happy with how it turned out!
But it is quite usable! And I am quite happy I was able to make it work with the buttons from an old printer xD.
Some parts that I also want to add are a battery that can be externally charged because, at the moment, it is powered by a power bank, where its USB cable is cut to be able to go through a switch to be able to turn it on and off, but I want to make it more elegant and have a battery inside the case that can be charged externally!
But you always learn and improve with every project! And honestly, I think I was able to learn and also achieve this “I can make that” feeling, which is the best part of doing projects like this!
The best way to learn is to just do and try things out! You will always encounter problems and issues, but that is part of the fun and the learning process!
Also, I am planning to make another post soon for an update on one of my projects, so stay tuned for that ;)
But once again. I shall see you at the next one! I hope you enjoyed this post and got to learn something as well, and thank you so much for reading! :D